Tiramisu has always been my ultimate comfort dessert. It takes me right back to those cozy family nights, sitting around the table with a big pot of coffee, swapping stories, and laughing way too loud.
But let’s be real… sometimes the whole process of making tiramisu from scratch feels like running a marathon in your kitchen. I know I’m not alone here!
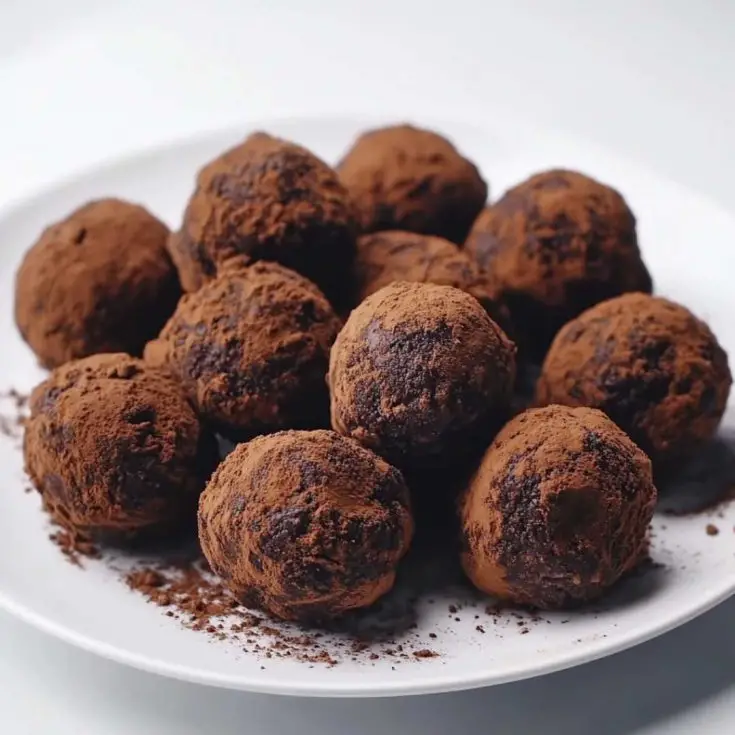
That’s why I’m obsessed with these no-bake Tiramisu Truffles. They’ve got all the dreamy flavors — creamy mascarpone, bold espresso, and rich chocolate — but in a bite-sized, no-fuss package. No layering, no oven, just pure dessert happiness you can whip up anytime.
Why You’ll Love This No-Bake Dessert
- Quick and Easy
- Rich and Creamy
- Perfectly Balanced Flavors
- Great for Any Occasion
No-Bake Tiramisu Truffles
To make these delicious desserts, you’ll need the following ingredeints:
Ingredients
| Ingredient | Amount |
|---|---|
| Heavy cream | 1 tablespoon |
| Dark chocolate | 2.5 ounces |
| Milk chocolate | 2.5 ounces |
| Espresso | 1 ½ – 2 tablespoons |
| Espresso powder | 1 ½ teaspoons |
| Cocoa powder | 2–3 tablespoons (for coating) |
| Chocolate curls | 1/4 cup (for garnish) |
| Savoiardi cookies, crushed | 12 ounces |
| Sugar | 1/2 tablespoon |
| Mascarpone cheese | 2/3 cup |
Optional Add-ons
- A splash of coffee liqueur for a boozy twist.
- White chocolate coating for a sweeter variation.
- Crushed hazelnuts or almonds for extra crunch.
- Cinnamon or nutmeg for added warmth.
Tools You’ll Need
- Mixing bowls – To combine all ingredients smoothly.
- Microwave or double boiler – To melt the chocolate evenly.
- Spoon or spatula – For mixing and folding ingredients together.
- Food processor or rolling pin – To crush the ladyfingers.
- Baking sheet lined with parchment paper – For setting the truffles.
Step-by-Step Instructions

1. Melt the Chocolate
Chop the dark and milk chocolate into small pieces and place them in a microwave-safe bowl. Add the heavy cream and microwave in 20-second intervals, stirring after each until the chocolate is fully melted and smooth. If using a double boiler, stir constantly over low heat until melted. Set aside to cool slightly.
2. Prepare the Base
In a large mixing bowl, combine the crushed ladyfingers, sugar, and espresso powder. Stir well to evenly distribute the flavors. Pour in the freshly brewed espresso and mix until the crumbs are moist but not overly wet.
3. Incorporate Mascarpone
Add the mascarpone cheese to the mixture and gently fold it in using a spatula. Be careful not to overmix, as mascarpone can become too soft and lose its structure.
4. Combine with Chocolate
Once the chocolate has cooled slightly, pour it over the mascarpone mixture. Stir until everything is fully incorporated and you have a uniform dough-like consistency.
5. Form the Truffles
Using a spoon, scoop small portions of the mixture and roll them into bite-sized balls between your palms. If the mixture feels too sticky, refrigerate it for 10-15 minutes before shaping.
6. Coat and Garnish
Roll the truffles in cocoa powder for a traditional tiramisu touch or in chocolate curls for extra texture and elegance. Place them on a parchment-lined baking sheet.
7. Chill and Serve
Refrigerate the truffles for at least 30 minutes to firm up before serving. Enjoy them straight from the fridge or let them sit for a few minutes at room temperature for a softer bite.
Best Paired With
- Espresso or cappuccino – To enhance the coffee flavor.
- Dessert wine – Like a sweet Marsala or Vin Santo.
- Vanilla gelato – For a contrast of warm and cold textures.
Storage and Serving
Store in an airtight container in the refrigerator for up to 5 days. Freeze for up to 1 month, thawing for 10 minutes before serving.
Tips for Success
- Use high-quality chocolate for the best flavor.
- Don’t overwork the mascarpone, or the mixture may become too soft.
- If the dough is too sticky, chill it for 10-15 minutes before rolling.
Substitutes and Variations
- Dairy-free option – Use coconut cream and dairy-free chocolate.
- Low-sugar alternative – Replace sugar with a sugar substitute.
- Gluten-free – Use gluten-free ladyfingers.
Nutritional Breakdown
| Nutrient | Per Truffle |
| Calories | 140 |
| Carbs | 15g |
| Fat | 7g |
| Protein | 2g |
| Sugar | 7g |
FAQs
Can I make these ahead of time?
Yes! They actually taste better the next day as the flavors meld together.
Can I use instant coffee instead of espresso?
Yes, but dissolve it in hot water first to get a smoother flavor.
How do I prevent the truffles from melting?
Store them in the fridge until ready to serve, especially in warm weather.
Final Thoughts
And that’s it — all the tiramisu vibes you love, minus the hours of work.
These truffles are perfect for parties, coffee dates with friends, or those nights when you just need a little sweet pick-me-up with zero effort.
Pop one (or three), savor that creamy, coffee-kissed magic, and enjoy every bite without a single baking pan to wash. Your future self will thank you.
No-Bake Tiramisu Truffles
Ingredients
- Heavy cream 1 tablespoon
- Dark chocolate 2.5 ounces
- Milk chocolate 2.5 ounces
- Espresso 1 ½ – 2 tablespoons
- Espresso powder 1 ½ teaspoons
- Cocoa powder 2–3 tablespoons (for coating)
- Chocolate curls 1/4 cup (for garnish)
- Savoiardi cookies, crushed 12 ounces
- Sugar 1/2 tablespoon
- Mascarpone cheese 2/3 cup
Instructions
Step 1: Chop dark and milk chocolate; place in microwave-safe bowl with cream. Microwave in 20-sec intervals, stirring until smooth. Cool slightly.
Step 2: In a large bowl, mix crushed ladyfingers, sugar, and espresso powder. Add brewed espresso; stir until moist but not wet.
Step 3: Gently fold in mascarpone with a spatula until just combined.
Step 4: Pour cooled chocolate over mixture; stir until fully incorporated and uniform.
Step 5: Scoop and roll into bite-sized balls. If sticky, chill 10–15 minutes before shaping.
Step 6: Roll truffles in cocoa powder or chocolate curls. Place on parchment-lined sheet.
Step 7: Chill at least 30 minutes to firm up before serving. Enjoy chilled or slightly softened.