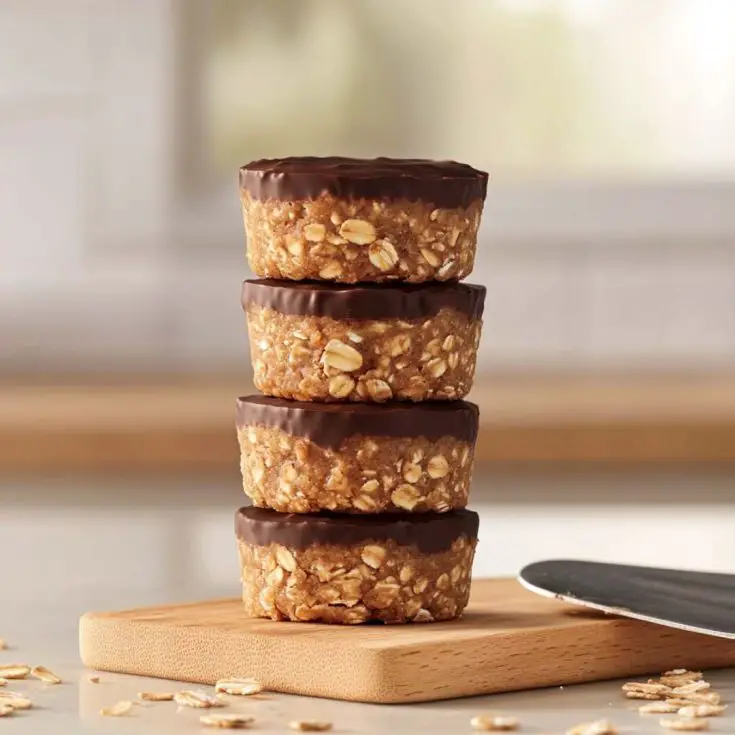
Last week, I was scrambling for a quick snack to keep my energy up between Zoom calls and chasing my toddler, when I spotted some oats and peanut butter in the pantry begging for a purpose.
I whipped up these 4-ingredient Peanut Butter Oat Cups, and holy cow—they’re like a Reese’s cup but wholesome, with a chewy oat base and a silky chocolate top that had me sneaking extras.
If you’re after a healthy, no-bake treat, let’s make these happen!
Why These Healthy Cups
- Classic combo
- No bake
- Texture heaven
- Perfect for snacks
No-Bake Peanut Butter Oat Cups
For this delicious no-bake dessert, you’ll need the following ingredients:
Ingredients
| Ingredient | Amount |
|---|---|
| Unsalted creamy peanut butter | 8 tablespoons |
| Maple syrup | 6 tablespoons |
| Rolled oats | 1 3/4 cups |
| Vegan chocolate chips | 1/2 cup |
| Unsalted creamy peanut butter (topping) | 5 tablespoons |
Optional Add-Ons
- 2 tbsp chopped almonds – Sprinkles a crunchy, nutty boost on top.
- 1 tsp chia seeds – Mixes in extra nutrition and subtle texture.
- Pinch of sea salt – Enhances the chocolate with a savory pop.
Tools You’ll Need
- Muffin tin – Shapes the cups into perfect portions.
- Mixing bowl – Blends the oat base smoothly.
- Spatula or spoon – Mixes and presses everything neat.
- Microwave-safe bowl – Melts the chocolate topping easily.
- Muffin liners – Keeps cups from sticking, saves cleanup.
Step-by-Step Instructions

Step 1: Prep the Muffin Tin
Line a standard muffin tin with 10-12 paper liners—makes it easy to pop the cups out later. If you skip liners, grease the tin lightly—saves you from scraping.
Step 2: Mix the Oat Base
In a mixing bowl, combine the 8 tbsp unsalted creamy peanut butter and 6 tbsp maple syrup—stir with a spatula ‘til smooth and glossy. Add the 1 ¾ cups rolled oats and mix ‘til the oats are fully coated—should look sticky and clumpy.
Step 3: Portion the Base
Scoop about 2 tbsp of the oat mixture into each muffin liner—press it down firmly with the back of a spoon or your fingers to form a compact, even layer. Should fill 10-12 cups—make sure they’re packed tight.
Step 4: Chill the Base
Pop the muffin tin in the fridge for 15-20 minutes to let the oat bases firm up—keeps them from crumbling when you add the topping. They’ll feel solid but still slightly soft—perfect.
Step 5: Melt the Chocolate
In a microwave-safe bowl, combine the ½ cup vegan chocolate chips and 5 tbsp unsalted creamy peanut butter—microwave in 20-second bursts, stirring between, ‘til smooth and melted. Takes about 60-90 seconds—watch it to avoid burning.
Step 6: Top the Cups
Pull the muffin tin from the fridge—spoon about 1-2 tsp of the melted chocolate-peanut butter mix over each oat base, spreading it to cover the top. Tap the tin gently to smooth it out—looks like a candy bar already.
Step 7: Freeze to Set
Place the muffin tin in the freezer for 20-30 minutes ‘til the chocolate topping is hard and the cups are set. They’ll hold their shape and be ready to pop out—don’t skip this step.
Step 8: Serve and Enjoy
Remove the cups from the muffin tin—peel off the liners and let ‘em sit at room temp for 5 minutes to soften slightly. Bite into that chewy, chocolatey goodness—snack time just got epic!
Storage and Serving
Store in an airtight container in the fridge for up to 10 days—freeze for up to 3 months for longer stash. Serve chilled or at room temp—great for quick snacks, post-workout bites, or sneaky desserts.
Substitutes and Variations
- Swap maple syrup for honey—similar sweetness, stickier.
- Use dark chocolate chips for a richer top.
- Add a dash of cinnamon for cozy warmth.
Nutritional Breakdown
| Nutrient | Per Cup (12 cups total) |
|---|---|
| Calories | 220 kcal |
| Fat | 12g |
| Protein | 5g |
| Total Carbs | 24g |
| Fiber | 3g |
| Net Carbs | 21g |
Note: Values are approximate and vary by brands.
Pairing Suggestions
- Serve with a banana for a quick breakfast boost.
- Pair with almond milk for a creamy sip.
- Add a side of Greek yogurt for protein balance.
- Enjoy with green tea—light and refreshing.
Common Mistakes to Avoid
I’ve goofed these up before, so here’s how to skip the traps with some extra clarity:
- Skipping the chilling steps and watching layers slide apart – If you don’t refrigerate the oat base or freeze the finished cups, the warm peanut butter and chocolate stay too soft, causing the topping to slip off; I’ve had a sloppy batch that looked like a melted candy bar—chill at every stage.
- Overheating the chocolate and getting a grainy, seized topping – Microwaving the chocolate and peanut butter too long or at high power makes it clump and turn gritty, ruining the smooth finish; I’ve tossed a lumpy topping before—use short bursts and stir often.
- Not pressing the oat base firmly and ending with fragile, broken cups – If you lightly pat the oat mixture instead of packing it tight, the cups fall apart when you remove them, leaving you with chunks; I’ve had a few shatter on me—press hard to compact it.
FAQs
How do I keep the cups from sticking without liners?
Lightly grease the muffin tin with coconut oil—pops out easier.
Can I make these in a different shape?
Sure, press into a square pan and cut into bars—same chill time.
How do I make them less sweet?
Reduce maple syrup to 4 tbsp—still holds but less intense.
Wrap Up
There you have it—my Healthy No-Bake Peanut Butter Oat Cups, the quick-fix snack that turned a pantry raid into a wholesome treat. They’re chewy, chocolatey, and simple enough to make while life’s a whirlwind. Hope they bring some joy to your busy days—let me know if you give ‘em a try. Now grab that peanut butter and get mixing—you’re in for a good one!
4-Ingredient No-Bake Peanut Butter Oat Cups
Ingredients
- Unsalted creamy peanut butter 8 tablespoons
- Maple syrup 6 tablespoons
- Rolled oats 1 3/4 cups
- Vegan chocolate chips 1/2 cup
- Unsalted creamy peanut butter (topping) 5 tablespoons
Instructions
Step 1: Line a muffin tin with 10–12 liners or lightly grease if skipping liners.
Step 2: Mix peanut butter and maple syrup until smooth, then stir in oats until fully coated.
Step 3: Scoop 2 tbsp of oat mix into each cup and press down firmly to form a base.
Step 4: Chill the muffin tin in the fridge for 15–20 minutes to firm up the base.
Step 5: Melt chocolate chips and peanut butter in 20-second microwave bursts, stirring until smooth.
Step 6: Spoon 1–2 tsp of melted topping onto each base and smooth it out.
Step 7: Freeze for 20–30 minutes until the topping is set and cups are firm.
Step 8: Remove from tin, peel off liners, and let sit 5 minutes before serving.