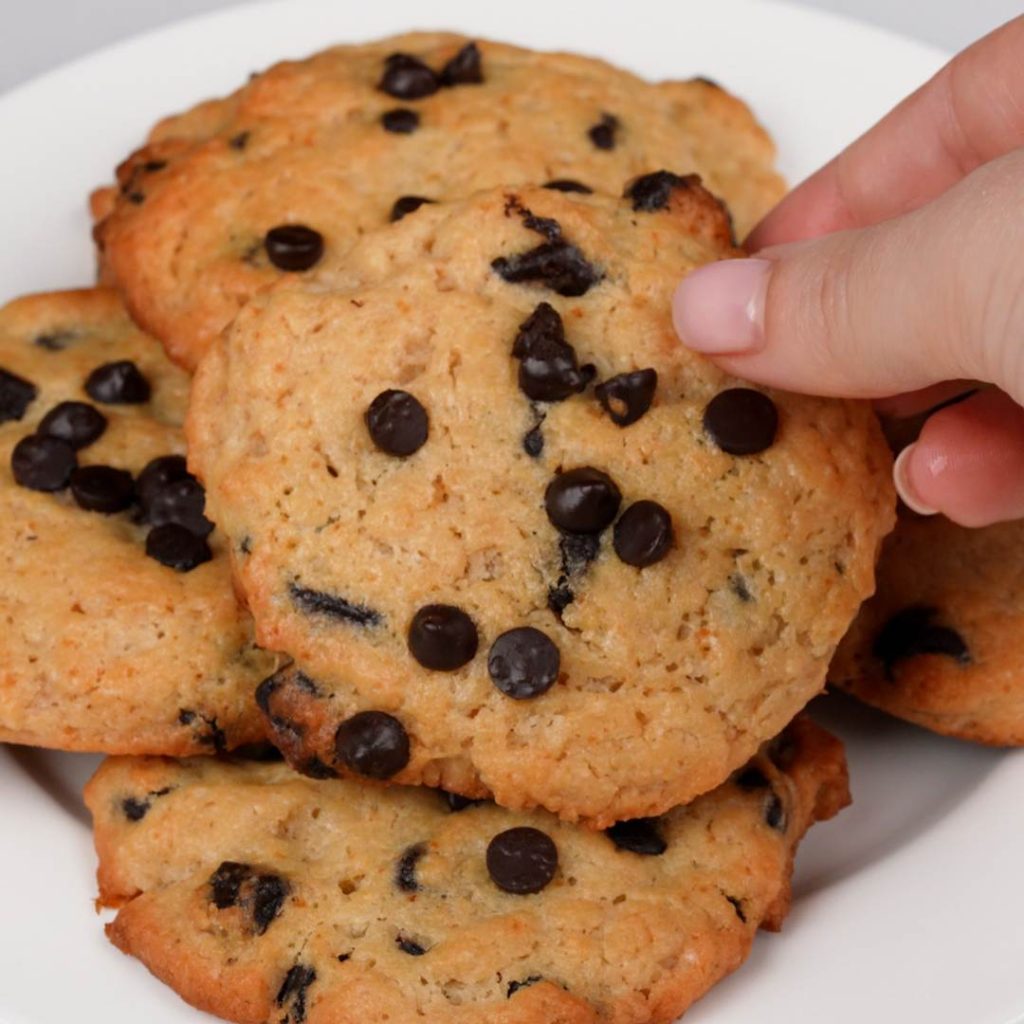
It all started on one of those weeknights when the craving for cookies hits hard but the fridge is staring back at you with half-used containers begging to be used up.
That’s when I spotted the Greek yogurt about to expire and thought: why not? My usual chocolate chip cookies had been good, but honestly, a little predictable.
Swapping in Greek yogurt felt like a gamble, but the result? Softer, chewier, richer cookies that disappeared faster than I could cool them.
Now, whenever I bake these, someone in the house inevitably asks, “What’s your secret?” and I just smile—because it’s sitting right there in the dairy aisle.
Why You’ll Fall in Love with These Cookies
- Soft
- Chewy
- Easy
- Simple Ingredients
Greek Yogurt Chocolate Chip Cookies Recipe
| Ingredient | Amount |
|---|---|
| All-purpose flour | 1¾ cups |
| Plain Greek yogurt | ½ cup |
| Semi-sweet chocolate chips | 2 cups |
| Baking soda | ½ tsp |
| Salt | ½ tsp |
| Unsalted butter | ½ cup + 1 stick |
| Granulated sugar | ½ cup |
| Brown sugar, packed | ½ cup |
| Vanilla extract | 1 tsp |
Essential Tools for Cookie Success
You don’t need professional equipment, but having the right tools makes the process so much smoother:
- Large rimmed baking sheet
- Parchment paper
- Medium mixing bowls (2)
- Electric mixer
- Small cookie scoop
- Wire cooling rack
Pro tip: I use a 1.5-tablespoon cookie scoop, and it gives me perfectly sized cookies every single time!
Step-by-Step Instructions

Step 1: Set the Stage
Preheat your oven to 375°F. Line your largest rimmed baking sheet with parchment paper. Trust me, this makes cleanup a breeze and prevents any sticking disasters.
Step 2: Create Your Dry Foundation
In a medium bowl, whisk together your flour, baking soda, and salt until well combined. I like to give this mixture a few extra whisks to make sure everything is evenly distributed. This step might seem basic, but it ensures your leavening is evenly distributed throughout every cookie.
Step 3: The Creaming Magic
Here’s where the real magic happens. In your larger mixing bowl (or using a stand mixer if you have one), beat together that room-temperature butter with both sugars. Beat for a full 6 minutes. You want the mixture to be light, fluffy, and almost doubled in volume. Scrape down the sides every couple of minutes.
Step 4: The Yogurt Integration
Add your Greek yogurt and vanilla extract to the fluffy butter mixture. Beat just until everything is well blended. You’ll notice the mixture might look slightly curdled at first, but that’s totally normal! The yogurt is working its magic.
Step 5: Bringing It All Together
Add your flour mixture to the bowl and mix on low speed just until the flour disappears. Don’t overmix here.. We want tender cookies, not tough ones. The dough should look slightly softer than traditional cookie dough thanks to that yogurt.
Step 6: The Chocolate Finale
Fold in those chocolate chips by hand using a wooden spoon or sturdy spatula. I like to save a few chips to press on top of each cookie before baking—it makes them look bakery-perfect!
Step 7: Portion Like a Pro
Using your cookie scoop (or a spoon if you don’t have one), portion the dough onto your prepared baking sheet, leaving about 2 inches between each cookie. They’ll spread just enough to create perfect rounds.
Step 8: The Perfect Bake
Bake for 8-10 minutes, watching carefully after 8 minutes. You want the edges to be set and just starting to turn golden, but the centers should still look slightly underbaked. They’ll continue cooking on the hot pan after you remove them.
Step 9: The Cooling Game
Let the cookies cool on the baking sheet for 5-10 minutes before transferring to a wire rack. This prevents them from falling apart and allows them to finish setting up perfectly.
Storage and Freshness Secrets
One of the best things about these cookies is how well they keep their soft texture! Store them in an airtight container at room temperature for up to a week. I like to add a slice of bread to the container—it helps maintain that perfect soft texture.
Freezing tip: These cookies freeze beautifully! Freeze the baked cookies for up to 3 months, or freeze scooped cookie dough balls on a baking sheet, then transfer to freezer bags. Bake frozen dough balls directly from the freezer, adding 1-2 extra minutes to the baking time.
Variations to Try
Once you’ve mastered the basic recipe, the fun really begins! Here are some variations I’ve tried that were absolute hits:
Flavor Adventures
- Double Chocolate Dream: Replace ¼ cup flour with cocoa powder and use dark chocolate chips
- Lemon Berry Bliss: Add lemon zest and swap chocolate chips for dried blueberries
- Peanut Butter Paradise: Add 2 tbsp peanut butter and use peanut butter chips
- Coconut Lime Escape: Add shredded coconut and lime zest with white chocolate chips
Dietary Modifications
- Gluten-free: Use a 1:1 gluten-free flour blend
- Reduced sugar: Cut each sugar measurement by 2 tablespoons
- Dairy-free: Use vegan butter and coconut yogurt
Perfect Pairings and Serving Suggestions
These cookies are amazing on their own, but here are some combinations I’ve discovered that take them to the next level:
- Ice-cold milk: The classic pairing that never gets old
- Hot coffee or espresso: The slight tanginess complements coffee beautifully
- Vanilla ice cream: Make cookie ice cream sandwiches for the ultimate treat
- Fresh berries: The tartness plays perfectly with the sweet cookies
- Crumbled toppings: Break them up over yogurt or ice cream
FAQs
Can I use regular yogurt instead of Greek yogurt?
I don’t recommend it—regular yogurt has too much water content and will make your cookies spread too much and lose that perfect texture. Greek yogurt’s thick consistency is key to success.
What if I don’t have both brown and white sugar?
You can use all of one or the other, but the texture will change slightly. All white sugar makes them a bit more crispy, while all brown sugar makes them very soft and chewy.
Can I make the dough ahead of time?
Absolutely! The dough keeps in the fridge for up to 3 days. Let it come to room temperature for about 10 minutes before scooping, or bake directly from cold (add 1-2 extra minutes).
How do I know when they’re perfectly done?
The edges should be set and just starting to turn golden brown, while the centers still look slightly soft and underbaked. They’ll continue cooking on the hot pan after removal.
The Final Cookie
These cookies don’t last long, trust me, I’ve tested that theory. They’re soft, chocolatey, and just different enough to keep everyone guessing. Bake a batch, pour a glass of milk, and prepare yourself… because once you try them, there’s no going back to the old way.
Greek Yogurt Chocolate Chip Cookies

Ingredients
- All-purpose flour - 1¾ cups
- Plain Greek yogurt - ½ cup
- Semi-sweet chocolate chips - 2 cups
- Baking soda - ½ tsp
- Salt - ½ tsp
- Unsalted butter - ½ cup + 1 stick
- Granulated sugar - ½ cup
- Brown sugar, packed - ½ cup
- Vanilla extract - 1 tsp
Instructions
Step 1. Preheat oven to 375°F (190°C). Line a baking sheet with parchment paper.
Step 2. Whisk flour, baking soda, and salt in a medium bowl; set aside.
Step 3. In a large bowl, beat butter and both sugars for 6 minutes until light and fluffy, scraping sides as needed.
Step 4. Add Greek yogurt and vanilla. Mix until fully combined (it may look slightly curdled—totally normal).
Step 5. Add dry ingredients and mix on low just until combined. Don’t overmix.
Step 6. Fold in chocolate chips, saving a few to press on top of each cookie.
Step 7. Scoop dough onto the baking sheet, spacing 2 inches apart.
Step 8. Bake 8–10 minutes until edges are golden and centers look slightly underbaked.
Step 9. Cool on the baking sheet for 5–10 minutes, then transfer to a wire rack.
