You know that moment when you’re craving something sweet but don’t want to deal with a million ingredients or feel guilty afterward? That’s exactly where I was last Tuesday afternoon.
I opened my pantry and found almond flour, maple syrup, and coconut oil. Three ingredients. That’s all it took to make the simplest, most satisfying cookies I’ve had in weeks.
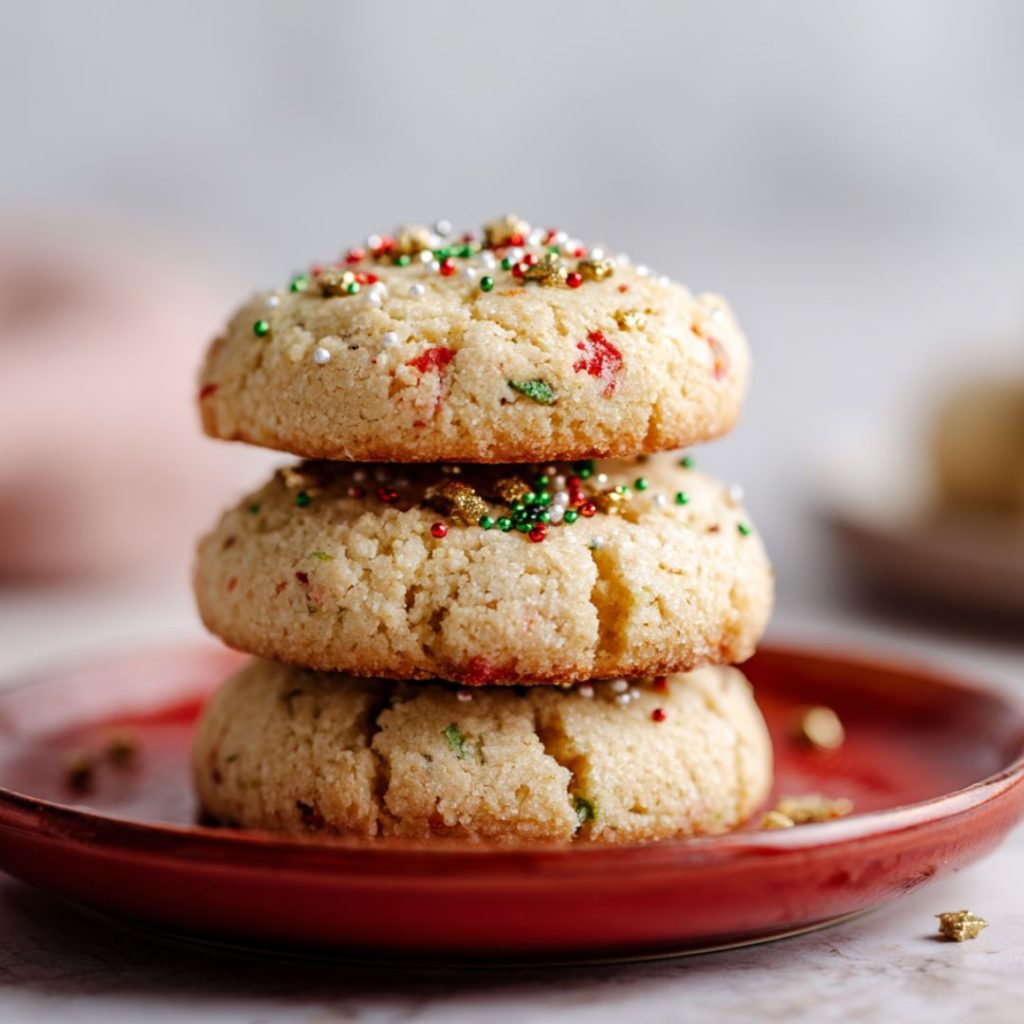
These 3-ingredient almond flour cookies are my new secret weapon. They’re naturally gluten-free and vegan, crispy on the edges and chewy in the middle, and they come together in about 15 minutes total.
The best part? Nobody will guess they’re made with just three basic ingredients. They taste like real cookies—not diet cookies, just good cookies that happen to be made with wholesome stuff.
Why You’ll Love These Almond Cookies
- Only 3 ingredients
- Gluten-free and vegan
- Ready in 15 minutes
- No refined sugar
3-Ingredient Almond Flour Cookies Recipe
Ingredients
| Ingredient | Amount |
| Pure maple syrup | 3 1/3 tablespoons |
| Coconut oil, melted | 3 tablespoons |
| Almond flour, packed | 1 1/2 cups |
Optional Add-Ins (Recommended)
| Ingredient | Amount |
| Pure vanilla extract | 1/2 teaspoon |
| Almond extract | 1/2 teaspoon |
| Sprinkles | as needed |
| Fine sea salt | pinch |
Step-By-Step Instructions
Step 1: Get Your Oven Ready
Preheat your oven to 325°F and line a baking sheet with parchment paper. This lower temperature lets the cookies bake evenly without burning the edges before the centers are done.
Step 2: Mix Everything Together
Dump all your ingredients into a medium mixing bowl—almond flour, maple syrup, melted coconut oil, and those optional flavor enhancers (vanilla, almond extract, and salt). Start stirring with a spatula to roughly combine everything. The mixture will look crumbly at first, and that’s totally normal.
Step 3: Bring the Dough Together
Switch from your spatula to your hands. Squeeze and press the dough together until it forms a cohesive ball. This takes about 30-45 seconds. The warmth from your hands helps the coconut oil bind everything. If the dough feels too wet, add another tablespoon of almond flour. If it’s too dry and won’t hold together, add a tiny splash more maple syrup.
Step 4: Shape Your Cookies
Scoop out about a tablespoon of dough and roll it between your palms into a smooth ball. Place each ball on your prepared baking sheet, leaving about 2 inches between them. These don’t spread much, so you can fit quite a few on one sheet.
Step 5: Flatten and Pattern
Take a fork and gently press down on each cookie ball to flatten it. Press once, then rotate 90 degrees and press again to create that classic crisscross pattern. The thinner you make them, the crispier they’ll be. I aim for about ¼-inch thick for that perfect balance of crispy edges and chewy centers. If you like, you can also add sprinkles at this stage.
Step 6: Bake to Golden Brown
Bake for 10-12 minutes. You’re looking for cookies that are slightly golden around the edges and feel just barely firm on top. They’ll still seem a bit soft—that’s exactly right. They firm up significantly as they cool, so don’t overbake them.
Step 7: Cool Completely
Let the cookies rest on the baking sheet for 5 minutes. They’re fragile when hot and will break if you move them too soon. After 5 minutes, transfer them to a cooling rack and let them cool completely. This is when they develop their final texture—crispy outside, chewy inside.
Ingredient Swaps & Substitutions
No coconut oil? Use melted butter (not vegan anymore but still delicious) or any neutral oil like avocado or grapeseed oil.
Maple syrup alternatives: Honey works perfectly here at the same measurement. Agave nectar also works, though it’s a bit thinner so you might need slightly less.
Extra sweetness: If you prefer sweeter cookies, add an extra tablespoon of maple syrup. You might need to add a touch more almond flour to compensate.
Storage & Make-Ahead Guide
- Refrigerator storage
Keep these in an airtight container in the fridge for up to 5 days. The cool temperature actually helps maintain their texture. Let them sit at room temperature for 5 minutes before eating if you prefer them less firm.
- Room temperature
Store in a sealed container at room temperature for 2-3 days, though they’ll be slightly softer this way.
- Freezing baked cookies
These freeze beautifully for up to 3 months. Layer them between parchment paper in a freezer-safe container. Thaw at room temperature for about 20 minutes.
- Freezing dough
Roll the dough into balls, freeze them on a baking sheet until solid, then transfer to a freezer bag. Bake from frozen, adding 1-2 extra minutes to the baking time.
Nutritional Information
Per Cookie (Makes approximately 12 cookies)
| Nutrient | Amount |
| Calories | 95 |
| Total Fat | 8g |
| Saturated Fat | 2.5g |
| Cholesterol | 0mg |
| Sodium | 25mg |
| Total Carbohydrates | 5g |
| Dietary Fiber | 1.5g |
| Sugars | 3g |
| Protein | 3g |
Serving Suggestions
- Enjoy with morning coffee or afternoon tea
- Pack in school lunchboxes for a healthier treat
- Crumble over coconut yogurt with fresh berries
- Sandwich with almond butter for extra protein
- Serve alongside fresh fruit on a dessert platter
- Dip in melted dark chocolate for special occasions
- Pair with a glass of almond milk for dunking
FAQs
Why are my cookies falling apart?
You either didn’t pack your almond flour when measuring, or you didn’t squeeze the dough together enough with your hands. Make sure to really work that dough until it holds together in a ball.
My cookies are too hard. What went wrong?
You probably overbaked them or pressed them too thin. Remember, they continue firming up as they cool, so take them out when they’re just barely set on top.
Can I make these nut-free?
Unfortunately, no. The recipe is built around almond flour, and there’s no good substitute that will give you the same results.
Final Words
These 3-ingredient almond flour cookies are their own thing—naturally sweet from maple syrup, tender from almond flour, with just enough richness from coconut oil to make them feel satisfying. What I love most is how uncomplicated they are. Three ingredients. One bowl. Fifteen minutes. No stand mixer, no chilling time, no complicated technique.
I keep these ingredients stocked in my pantry specifically so I can whip up a batch whenever the mood strikes. They’re perfect for when you want something sweet but don’t want the guilt or the hassle. Make a batch this weekend and keep them in your fridge. Future you will be very grateful to have homemade cookies ready to grab whenever that 3 PM snack craving hits.